This is part 2 of my 18th century stays project.
Continued from: Introduction and Materials
Prepare and Cut Fabric
Tip: starching your fabric before cutting will make this whole project much easier, since it won’t be stretching on you. You’re trying to get a bunch of layers to match up and look nice and you’re doing a lot more sewing than typical for a lined garment. And, yes, always pre-wash your fabric. Run it through a couple of cycles on hot water and hot dry. You want any shrinkage to happen now, before you spend days cutting and sewing.
Cutting it out was easy with a rotary cutter. Just take your time and be precise.
Mark Seam Allowances
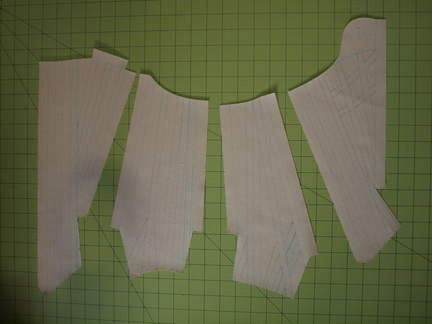
Go ahead and mark your seam allowances, so that you know how much space you have to work with. You’ll notice that I’ve pre-marked one large boning channel inside of the grommet line on the back and one small channel on the front. Since they are needed, no matter the rest of the boning layout, I drew them in with the seam allowances. For the reason for these channels, read below under My Approach. You’ll also want to transfer the bust line stitching line to the coutil for later use. Any cutting lines (like for tabs) I marked with a pencil.
Draft Boning Channels
The pattern comes with a suggested layout for the bones, using only the 36 inch (175 pound) heavy duty duct ties. This will make a very stiff pair of stays with larger gaps between each bone. As an improvement, I used the 175 pound duct ties only at the lacing edges and used 75 pound cable ties everywhere else. I used the 1790 half boned pattern from American Duchess (more or less, you’ll need to make it work for your particular size). The great thing is that you can draw the lines directly onto the coutil, since the lines will be hidden by the lining. I used a washable fabric marker, which was good because I had to re-draw a few lines. This amount of boning turned out perfect.
My Approach
- There should be a channel at every seam or lacing edge, but having a channel on only one side of the seam is OK.
- Tabs need to have some boning extending up into the body past the waist so that they don’t just fold at the waist. Any that don’t extend past the beginning of the tab do butt up against bones that do extend, usually from much higher up.
- Lacing needs extra strength, so I have 175 pound ties at the front and back edges. The back, which doesn’t need to curve as much, has a second 175 pound tie on the other side of the grommets. For the front, I put a 75 pound tie, which serves the same purpose, but with greater flexibility.
- Channels can’t be in the same spot as where the binding will go. A channel can be parallel and adjacent to the binding, but not under.
- Channels will extend all the way too the edge of the fabric, underneath the binding. Keep in mind that most channels will not intersect the edge at right angles. You want to minimize the number of sharp angles, since they are both difficult to cut and make for a very pointy bone that will want to poke its way out. I did end up with a couple of spots with angles slightly smaller than 45 degrees, but these are rare.
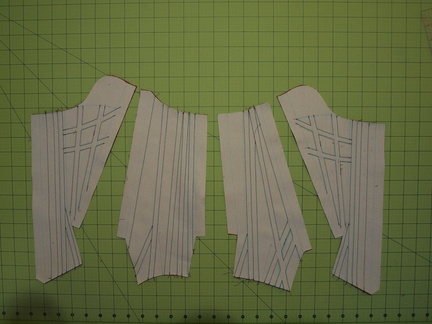
One modification I made to the American Duchess method was the horizontal channels in the bust and one tab. Instead of sewing in a separate pocket, I just made all the channels in the same layer, making sure to not stitch across the intersecting channels. Take a look at the picture at the bottom of this post for the best illustration.
How wide should the boning channels be? This is critical; if they are too wide, the bones will shift and twist, but if they’re too narrow, you won’t get the bones inserted. I more or less used 1/16 inch greater width than the cable tie, so that comes to:
- 175 pound (1/2 inch wide plastic) - 9/16 inch channel
- 75 pound (1/4 inch wide plastic) - 5/16 inch channel
You really should do a mockup with scraps of coutil and your outer fabric, because the specific fabric and ties make a difference.
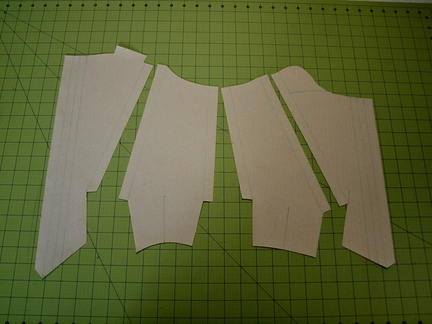
When you’ve drawn all your channels, you should end up with something like this.

You can see that I had to re-draw some of the channels to make things fit better. I couldn’t get the old line to erase completely, since I didn’t want to saturate the fabric and lose my starchiness. You’ll also see that some of my horizontal and vertical channel intersections aren’t drawn right. Just smudge out the line with a damp finger as best you can. When done right, the intersection should look like a + with openings from all four sides.
Once you’re done, you’ll see why I had to buy the 18 inch 75 pound cable ties online - they aren’t available that long in that width in retail stores. You may find some from electrical distributors, but most guys I know just put two together to make a longer one. That clearly doesn’t work for us.
Now, go ahead and sew all of these boning channels using a thread color that will look nice with your outer fabric. I used a dark brown. Use the same thread color on both sides; it won’t show on the inside anyway and you don’t want a different color peeking through to the outside. Don’t sew the seam allowance lines, those only get sewn when seaming the pieces together. Now it will look like this, except you’ll have a back piece on the left instead of the other front jumping into the photo. But, hey, at least you can see double the examples of how to sew those horizontal and vertical intersections.
Next: Inserting boning, seaming together, and installing grommets.

