Sunday, November 10, 2019
We arrived in Nakaale yesterday afternoon in good order after only about three and a half hours of driving. This was much better than only a couple of days earlier when the missionary who was picking us up came down to Mbale and the direct road was too muddy and the longer detour took him almost six hours.
The peace and quite here is lovely, especially after the bustle of Kampala. Birds and insects form the primary sound backdrop with everything so green compared to last I was here. It’s now the tail end of wet season, so the grass is high and the trees are in full leaf. When I was last here, it was March, which is the tail end of dry season, and that year was unusual because there had been no September-November wet season. I don’t think the temperature is that much different than Kampala, but it feels so much cooler with the lower humidity. I’ll take some pictures as I’m out and about for work the next couple of days.
Today has been a restful Sunday, with church this morning and dinner with the pastor, his family, and a number of others. We’ll have evening service, then cook our own supper.
Tomorrow, our work starts with me taking care of some maintenance work at the clinic and Taryn helping with the preschool, Karamoja Education Outreach (KEO).
Stuart
Friday, November 8, 2019
We finished out our time in Kampala well and came up to Mbale on Wednesday. It’s been a nice couple of days here visiting with friends and purchasing groceries to get us through the next few weeks.
Tomorrow, we head up to Karamoja. The roads have been pretty bad, so we may have to take the long way around to get to Nakaale. Thankfully, one of the missionaries will be driving us from Mbale, so we’re in good hands.
Prayer requests:
- My sore throat is over, but I still have a lingering cough that makes it difficult to have a conversation, since whenever I talk much, I start coughing.
- Margaret has been having trouble getting solid sleep. Hopefully the quiet in Karamoja will help with that.
Stuart
Sunday, November 3, 2019
We arrived without problems (both we and our baggage) on Tuesday night and got enough sleep to avoid jet lag, which was nice. That’s not to say that we aren’t dealing with sleep deprivation, but that’s technically something else. ;-)
Wednesday, we were able to go grocery shopping and get cell phone SIM cards and transfer up to the EMI apartment. Our apartment here is normally used by EMI interns, so it’s only set up with twin beds and the mosquito nets won’t work with the two beds squished together. Turns out that two people actually can sleep on a twin bed…
It’s been a busy few days of getting to know EMI and the Kampala area. I’ll post a better summary of EMI once we finish the rounds of talking with everybody, but I will say that it’s been very encouraging. Margaret has also been doing particularly well, which has made things easier.
We attended church today at New City Church and it was refreshing to feel like we were (almost) at our home church.
This week we’ll be with EMI for a couple of more days and then travelling up to Mbale to see friends for a day or two, then up to Karamoja at the end of the week. We still need to work out the details for all of that.
Please pray for:
- Knowing the right questions to ask so that we may get an accurate sense of the work and life here.
- Relief from my sore throat that I think I picked up on the flights.
Stuart
Monday, October 7, 2019
Four years after we left Uganda as individuals, we’re headed back as a family!
We’re leaving in only three short weeks, on October 28th, and returning a month later, on November 29th. We are excited to have two ministries to work with. For our first week, we will be working in the capital city, Kampala, with Engineering Ministries International, focusing on their research and development operations, which aligns with Stuart’s professional background. For the last three weeks, we will work in the rural northeastern region, Karamoja, with the Orthodox Presbyterian Church; there we will be assisting with facility maintenance and educational outreach, all of which supports church planting there. You may remember that this is where we met back in 2015, so it holds a special place in our hearts. In both places, we will be meeting our potential teammates and learning what work the Lord might have for us there long term, especially as we approach this as a family, rather than the individuals we once were.
As we prepare to go on this new adventure, we hope and pray you will support us however you are able. God works through the prayers of his people, and we covet yours. In order to keep you informed of our activities and prayer requests, we will keep this blog up to date. If you’d like e-mail updates, send me a request and I’ll add you to our list.
We are also looking for partners to join in sending us to do this work. We will be on the field for a month, and our cost will be $5800. We are 48% of the way there, so as of today we still need $3000. Progress to our goal is shown in the upper right of the page. And yes, my programming skills are completely rusty, so it’s just text!
Stuart
Saturday, April 13, 2019
I spent today cleaning and organizing our garage, which I’ve been putting off for years (the last time was before we were married). I kept adding stuff wherever it fit without much effort (usually the floor), which resulted in a garage where minor gymnastics were sometimes required to navigate it. While I don’t have a before-cleaning photo (I don’t tend to think of such things until after it’s too late), I do have a post-cleaning photo. You can use your imagination for what it looked like before my efforts. Some of it did go in the dumpster, but most of it was just organization. The thousands of mouse dropping, along with the desiccated carcass of one the producers of said droppings, definitely went in the dumpster. That’s not the hazard.
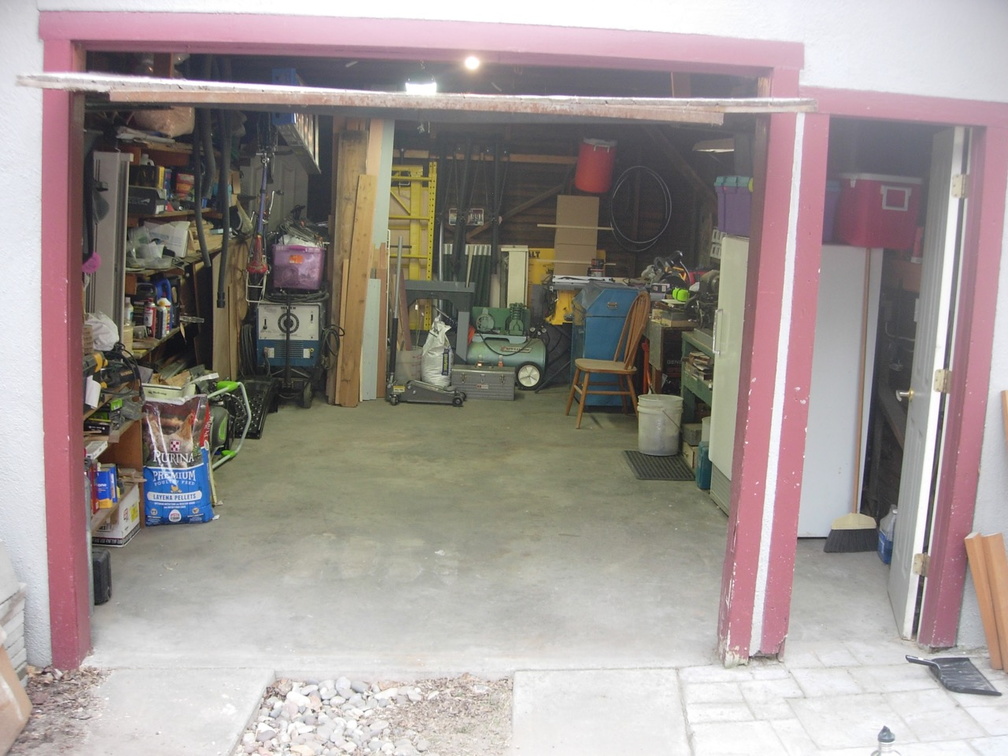
Now, cleaning a garage isn’t normally blog worthy. The impetus of the blog post is what happened about one hour after I finished cleaning. I went back into the garage to put something away, and out of the corner of my eye saw a huge empty space. My first thought was “who stole all my stuff?!” and a mild panic before coming to my senses and realizing that nobody had and that I was the source of the huge empty space. Which I had spent all day on and only finished one hour before. Sigh. I guess that’s the penalty for not cleaning for years.
Tuesday, November 6, 2018
This is part 4 of my 18th century stays project.
Continued from: Inserting Boning, Seaming, and Grommets
Now comes the most dreaded part of making stays. I used leather for comfort and durability reasons, and even though chamois is thin, it’s still leather. And I hate hand sewing. My fingers agree. It does have one advantage, though, which is that it has some flexibility to work around curves, much like bias tape. Leather also has no raw edges to fray.
Full disclosure: my sewing machine (a Juki DDL 8500-7) is capable of sewing right through cable ties, even the thick type, with a sharp needle. Despite its appearance, it’s actually designed for mid-weight fabrics, not heavy duty applications like leather. Your machine may not be able to do this, or it may require a bit of manual help on the wheel. Do not try to backstitch through a cable tie; every time I accidentally did, I broke a needle. So, with that precaution, try it on some scraps and see if you can. If not, you’ll need to do the whole binding process by hand or leave all the bones 1/4 inch short so they don’t extend into the binding.
Methods
So, how do we make this a less aggravating experience? Well, the answer depends on what you’re trying to accomplish. If you’re making a historical reproduction, it’s time to get acquainted with your needle, thread, and thimble. I’m not; this is for 21st century daily wear, and nobody but me should be seeing it anyway! ;-) What follows is what I learned.
[Read more…]
This is part 3 of my 18th century stays project.
Continued from: Fabric and Boning Channels
Inserting Boning, Part 1
I inserting boning in two stages to make the job easier and to allow me to be more precise. The first stage is for bones which will have both ends of their channels closed off by seams, rather than binding. The only occurrences of this are the horizontal bust bones, since one end butts against a full length bone and the other against a seam.
Cutting Boning
For the 75 pound cable ties, you can just use a pair of stout and sharp scissors. For the 175 pound duct ties, you’ll probably damage your scissors, so use a pair of diagonal cutters, making sure to point the end that will be cut off into a garbage can. It will go flying at a high rate of speed. If I didn’t already wear decently large eyeglasses, I’d totally be wearing safety glasses. Seriously. Pointy plastic in the eye has never been fun for anybody.
Boning End Preparation
Once you cut it to length (with the correct angle on each end), you’ll want to slightly round the end so that it isn’t going to damage your fabric or binding. I did this in two stages. First, use scissors to slightly clip the corners, just enough to take off the point. Second, hold the end near a candle flame until the edges just start to soften and round over. This may take some practice, but it’s far easier than using sandpaper. Note: If you over-melt the plastic, it will become bubbly and brittle, which you don’t want. If that happens, get a new piece and start over. Plastic is cheap.
The final length should allow you to insert the bone into the channel and have it flush or just below flush with the end of the channel, which is defined either by the edge of the fabric or a seam allowance line. Better to err on the side of being too short rather than sticking out; a 1/16 inch isn’t going to make much of a difference if too short, but will if too long. To get this right, I fully prepare one end, insert it into the channel, mark the length with a pencil (on the smooth side, which should be facing towards the outside fabric), remove it from the channel, cut it, and prepare the second end. You’ll probably get more than one bone per cable tie since a lot of the bones are short.
Seaming and Lining
Seam the four pieces per side together and press the seam allowances open, making sure not to overheat any bones you’ve already inserted. It will look like this.

[Read more…]
This is part 2 of my 18th century stays project.
Continued from: Introduction and Materials
Prepare and Cut Fabric
Tip: starching your fabric before cutting will make this whole project much easier, since it won’t be stretching on you. You’re trying to get a bunch of layers to match up and look nice and you’re doing a lot more sewing than typical for a lined garment. And, yes, always pre-wash your fabric. Run it through a couple of cycles on hot water and hot dry. You want any shrinkage to happen now, before you spend days cutting and sewing.
Cutting it out was easy with a rotary cutter. Just take your time and be precise.
Mark Seam Allowances
Go ahead and mark your seam allowances, so that you know how much space you have to work with. You’ll notice that I’ve pre-marked one large boning channel inside of the grommet line on the back and one small channel on the front. Since they are needed, no matter the rest of the boning layout, I drew them in with the seam allowances. For the reason for these channels, read below under My Approach. You’ll also want to transfer the bust line stitching line to the coutil for later use. Any cutting lines (like for tabs) I marked with a pencil.

[Read more…]
Monday, November 5, 2018
In May of this year, Taryn and I vacationed in Virginia as a combined trip for her brother Dan’s wedding and a two-year wedding anniversary trip for us. Two of our stops after the wedding were Mount Vernon and Colonial Williamsburg, where Taryn fell in love with the women’s clothing. We grilled the interpretive staff at both locations to understand construction details and style considerations. I’ve never sewn women’s clothes before, let alone from two and a half centuries ago, so I had plenty to learn!
The basic working clothing for a woman would have been the shift, stays, petticoat, short gown, kerchief, apron, and cap. Taryn wanted to have a petticoat and short gown outfit of her own for everyday wear. Now, the challenge with this is that the outfit only looks “right” with the stays underneath to shape the bust correctly. So, not only am I learning to make women’s garments, but jumping straight to the challenge of corsetry! This project turned out to not be all that difficult, but it did take a lot of time. From cutting to completion, it was one month of work. Now, granted, I have a day job that involves no sewing, but I did probably spend a couple of evenings a week and most Saturdays and a couple of Fridays on this project.
Some background on stays (and why Taryn isn’t as crazy as you might think): Unlike Victorian era corsets, which were laced so tight that they shifted the bones around and deformed internal organs, 18th century stays conform to the torso and support the breasts. One of the interpreters commented that they act more as a reminder to keep proper posture (upright rather than slouching) and proper ergonomics (squat rather than bent over) when picking things up. Spoiler alert: Taryn says it’s far more comfortable than any bra she’s ever worn, even her expensive, good bras. Thinking about it, that makes sense; instead of elastic pulling the breasts in tight and thin straps transferring the load to the shoulders, the entire torso carries the load, distributed by the body-shaped bones.
One interpreter recommended we take a look at the Simplicity 8162 pattern by American Duchess, as it’s a fairly accurate modern pattern for 18th century stays. I needed modern instructions for my first attempt, as well as sizing I could trust. You’ll also notice that I’ve used, almost exclusively, modern techniques. I love my sewing machine and I don’t love hand sewing. These will be used for everyday wear, not for reenacting, so I’m not worried about it looking 100 percent historically correct.
Oh, and the stays versus corset terminology? It depends on the time period. Stays tend to come earlier usage than corset, but both words were used at this time period (1790s). I’ll use stays for these instructions, but Taryn usually refers to them as her corset. And technically, it’s a pair of stays. Anyway, off of the boring terminology and on to the fun part, making ‘em!
Materials
- Coutil - It’s worth buying the real stuff, available from multiple sellers on Etsy, so that your finished product doesn’t twist into weird shapes. It’s also a joy to work with.
- Outer fabric - I used quilting cotton, but I’d pick something stronger next time for durability.
- Lining fabric - I used the same quilting cotton as the outer fabric, which was fine for the lining.
- Boning - I used a combination of 36 inch duct ties (175 pound tensile strength) from Home Depot and 18 inch cable ties (75 pound tensile strength) from Amazon.
- Grommets - I used 5mm grommets from Kam Snaps (you’ll also need the tools to install). Note that to be period correct, you’d need to hand stitch the eyelets rather than use metal grommets.
- Twill tape - 1/2 inch wide, as called for on the pattern. Once again, Etsy is your friend when trying to find natural colored cotton twill tape.
- Chamois - I used this instead of twill tape for the binding, both for comfort and durability. Available from your local auto parts store in the car cleaning section. Just make sure it’s actual leather and not a synthetic imitation.
Make a Mock-Up
Being the cautious person that I am, I cut out the pattern pieces for the size that the pattern envelope called for based on Taryn’s measurements and make a quick mockup from cotton duck I had lying around. No bones, no grommets, just stitched together to get an idea of whether we were even close. I’ve heard that taping some bones to the fabric can help get a better idea of how it works; I’ll probably try that in the future. The mockup looked tolerably close, even though it looked terrible without any structure from bones, so I proceeded with cutting out the real fabric.
Next: Preparing and cutting fabric, and marking and sewing boning channels.
Thursday, November 26, 2015
Looking back over the past year, I have much to be thankful for. God definitely has a way of giving us far more than we expect. To be truly thankful requires that we actually name that for which we thankful. So, what are some of those things on my list?
- A job where I feel that I can do good work and where I’m appreciated.
- A wonderful church family (I’ve said this one several years in a row, and more significantly every time).
- A warm, comfortable home.
- The liberties we enjoy, particularly that we can freely and rightly worship God without fearing for our lives.
- A better concept of my potential role as as missionary, gained after the wonderful month in Uganda.
- Taryn. A year ago, if you asked me if I would be engaged within a year, I would have laughed. But, God does have that way of giving the unexpected, and I wouldn’t have it any other way.
What does the next year hold? I may have my ideas, but one thing of which I can be confident is that my list next year will have things on it that I couldn’t even dream of now.
Happy Thanksgiving, everyone!